- All products are added to your cart.
Decorate candles using Waterslide decals
|
The decoration of candles has always been popular, but due to the possibilities of indirect printing of candles, this popularity has increased even more. Now you can print and apply everything from the computer without too many problems. Think of: a picture of your (grand) children, text, the logo of your company or whatever you have or can find on the computer. In this explanation I will tell you how you can do this with the help of Waterslide decal paper, I use Laser - Sunny waterslide decal paper Clear. Inkjet Sunny waterslide decal paper is also fine and I will also explain with the additional steps needed for inkjet decals. I use the Clear version because in my case the candle is white and the white decal material probably has a different white tint than the candle, so non-printed parts can give a color difference to the white of the candle. This is not a problem in the examples used in this manual because the image is rectangular, but if you have separate texts or images in a different form, this is an important point. For this reason I recommend using clear decal paper on all white and light colored (pastel) candles, and a white decal paper on colored (even yellow) to black candles.
|
||
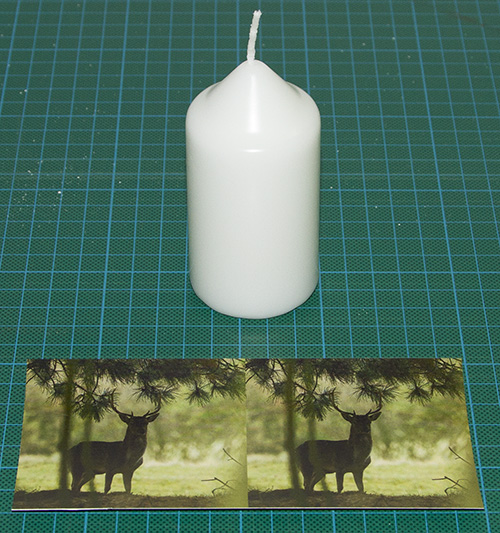
Requirements used in this explanation:
|
 |
|
|
* It is important that the tissue is clean, and preferably not used before. A used tissue sometimes tend to release a lot of particles, so it is best to use a new one each time. Use tissues free from ointments, fats, oils and similar additives.
|
||
|
|
PreperationDegrease the candle with, for example, alcohol or ammonia, it may sound strange, but the surface becomes somewhat rougher and gives the decal a better adhesion. Then print the waterslide decal using the settings on the manual supplied. For users of inkjet printers only:(if you have a laser printer you can skip this)
|
|
|
|
||
Releasing the decal:1)Place the decal in a container with water for about 30 seconds so that it can soak. Use lukewarm water especially in cold weather, because with too cold water it can take too long before the decal releases and with that the glue dissolves too much.
|
||
|
|
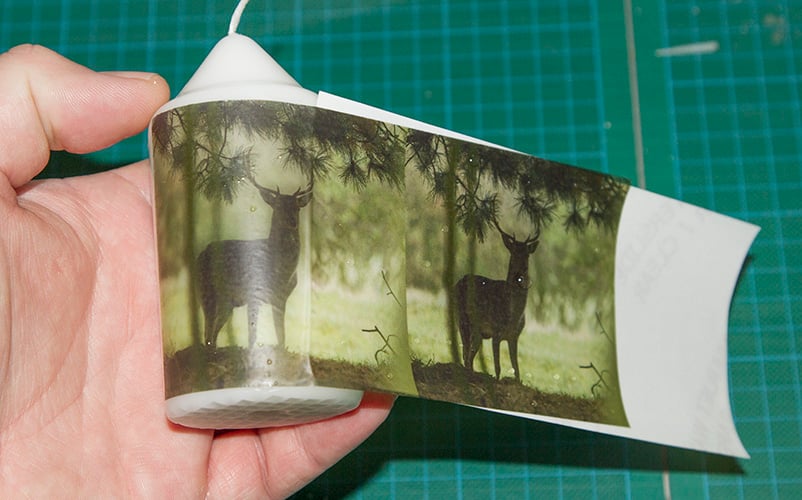
Applying the decal:First make the candle a little wet / damp with a cloth, a brush or by dipping it, this makes the decal easier to position. Then apply the previously exposed part of the decal to the candle, and position it so that it is placed straight on the location where you want the decal. Hold the candle with one hand and place a thumb on the part of the decal that you have applied, then hold the exposed part of the carrier with your other hand. In the meantime, turn the decal around the candle by pulling the carrier around. Don't hurry and do not pull too hard on the carrier as this may cause the decal to tear or break. Once the entire carrier has been removed, check that the decal is straight. Now you can carefully wipe away the moisture and air bubbles under the decal with your fingers or a plug made of a tissue, start at the beginning of the decal and work both upwards and downwards from the middle of the height (between fuse and butt). First work with low pressure and as soon as you feel that the decal is becoming more adhered you will press a little harder. Repeat this until you have no more bubbles under the decal and you will not see moisture coming out from under the decal. If you are in the possession of a squeegee, you can use it at this step. Place the squeegee flat on the candle and work with the rounding of the candle to the end (overlapping piece) of the decal. First carefully drag the squeegee behind your hand so that you wipe it. Do not make zigzag movements this can damage, crease or tear the decal. If you have done this a few times and there is little to no moisture under the decal then you can carefully turn the squeegee around so that you just "scrape" with the squeegee over the decal towards the end (overlapping part) of the decal.
|
|
Finishing:The application of the decal is finished, now allow it to dry properly. It is advisable to allow to dry for at least 24 to 48 hours at room temperature in a dry room. I have noticed that a decal on a candle needs longer to dry than for example on plastic or ceramic. It can always help by blow-drying an object for 5 to 10 minutes, but be careful that the candle does not melt and you do not get too close (less than 10cm) than the decal can burn or discolour. Even after blow-drying, I recommend that you leave it to dry for at least 24 hours. Unfortunately, it is difficult to see if a decal is dry, so you better let it dry for too long. The only way to find out is to peel a corner, the disadvantage of this is that once it is loose it is often difficult to get it to stick again.
|
|
|
Optional:After the decal is completely dry, you can touch-up the whole decal and a piece of the candle, or just touch the edges of the decal with a brush and some clear varnish. This ensures that the decal can not come off so quickly, when you paint the entire decal it also protects the print (especially important for a laser decal) I myself have done this with the candle in the example and have chosen to do this with Microscale Liquid decal film. The reason for this is that it is a very thin flowing lacquer agent that barely shows there is lacquer applied but it closes the edges so that the decal can not come loose. Even if you fiddle with your fingernail, you have to make quite some effort to release the decal. After applying the clear coat, allow the whole to fully cure for at least 4 to 7 days before you burn the candle, otherwise it can start to smell if the paint becomes hot or burns.
|
||
|
|
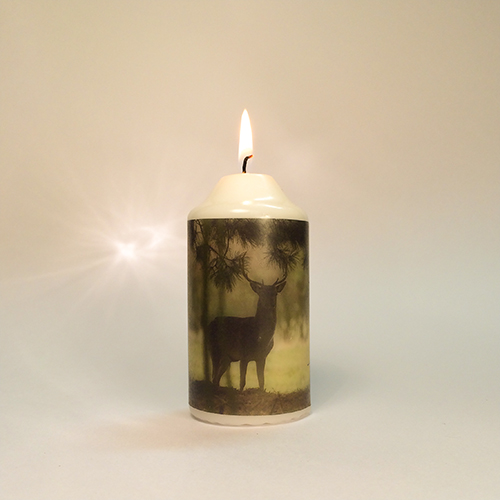
Can the candle still burn?Yes it can...A laser decal without further finishing can be burned without problems at all, the decal will in most cases shrivel and end up in the wax. However, if you see that the decal is left while the candle is melting away, then you could cut off the decal to where the candle has melted at that moment. |
|