- All products are added to your cart.
Using Waterslide decals
In this "How To" we describe how to decorate a jerkbait using a decal. The "design" is made with free software named "GIMP" but other drawing programs will work too. The body of the bait is handmade but all types of jerkbaits, spinning blades and plugs can be used with this method.
|
|
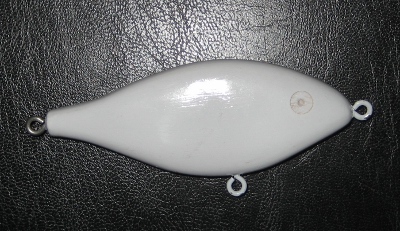
This is the jerkbait where this "How To" is about. First I have paint it with a white primer and made is smooth and clean. |
|
|
The next step is to copy the jerkbait to your computer. There are several methods such as making a photo, scanning or if you can draw, just draw it. If you use a flatbed scanner as we do, make sure the settings are as high as possible. In this case we used a black sheet to get a black background. We also set the brightness a little lower and the contrast much higher to make the edges clear. Notice the eye, we still want to see it for the reference later.
|
|
|
 |
Now you are ready for the next step . The jerkbait is on your screen and you want it just black and white. You have to simplify the image. First thing to do is the eye. In "GIMP' you use a hard, round brush and place it on the eye. Play something more with the brightness and contrast.
If necessary remove the screws with a pencil tool. |
|
|
Now we have an nice black and with image of the jerkbait. Add a new layer in "Gimp" and delete al black parts. Click with the Magic wand tool on the fish reverse the selection and press delete. Copy the layer with the fish a few times. The raison is that you always can go back to the white fish if something goes wrong.
|
 |
|
 |
Next you need to design your fish. With "GIMP" you can make gradients, all different kind of selections and play with the transparency of the layers. It's advisable to make every change on a new layer. This jerkbait contains 10 layers; The white fish, a yellow layer, a layer with the gills of the fish, a layer with the stripes on the back, a honeycomb layer, a layer with a gradient on the body, a layer with the mouth and finally a layer with the gradient of the head.
|
|
|
Now your design is ready you need to be sure the format is still good. You can do that to go back to your first layer. It is easier to make the print a little bigger so you have |
 |
|
Only for inkjet users:You will need to clear coat the printed sheet before you can continue. If you do not clearcoat first, the ink well dissolve when you put the decal in water for releasing it. Inkjet inks are not waterproof so a coating is needed to make them waterproof, keep in mind to spray sufficient clear coat as it need to form a completely closed layer otherwise water may sip through still. |
||
|
|
Cut your decals out of the sheet using a pair of scissors or preferably a sharp knife and a cutting mat. As you can see it is not exactly on the edges, because this is clear decal paper en the jerkbait was painted white the edges aren’t visible later. | |
|
Once the decals are cut, get a bowl of water with warm to lukewarm water. It is better the water is to cold than too warm. With cold water the decal is less easily released from its carrier but with too hot water the glue can dissolves in the water. When you place the decals in water it is normal it curls, once fully wet it will get flat. In general, as soon as the decal and his carrier is flat you can slide the decal from its carrier. |
 |
|
 |
Next step is to slide your decal to the jerkbait. Because this are quite large decals it is preferable to slide directly to the jerkbait. When you first moisten the jerkbait the decal will slide easier over the jerkbait. Once the decal lies over the jerkbait you can gently positioning the decal with your finger. Then gently wipe with a cloth and remove al water and air bubbles. Now you have to let it dry, sometimes it is necessary to press the edges of the decal for a better adhesion. |
|
|
The jerkbait is drying and after 15 minutes we can start at the other side of the fish. Once done you could paint the area between the two decals. After that it is time to varnish the jerkbait. Using an epoxy like Envitotex, it will remain much longer than a clearcoat even after catching a fish. However is it fun to make your own jerkbaits and the way we describe the process you can decorate much more. How about your name on your own rod, doesn't that looks very profesional? The possibilities are endless!
|
 |
|